How to Set Up a Turbo Button
A turbo button, also known as turbo fire, autofire, or rapid fire, allows you to rapidly input a button simply by holding it down. The feature is commonly found on third-party controllers for gaming consoles, and is often implemented in emulators as well.
INFO
RetroAchievements allows a turbo button to be used while earning achievements, including in hardcore mode.
RetroAchievements adds PlayStation and Xbox style achievements to your classic games. Sign up on RetroAchievements.org to get started.
This tutorial will explain how to set up a turbo button in RetroArch, including global and game-specific configurations. Other emulators that support RetroAchievements are also explained.
RetroArch
Global configuration
RetroArch has a global setting to assign a turbo button that affects all emulator cores. It isn't assigned by default, but can be found by navigating these menu options:
- Settings
- Input
- RetroPad Binds
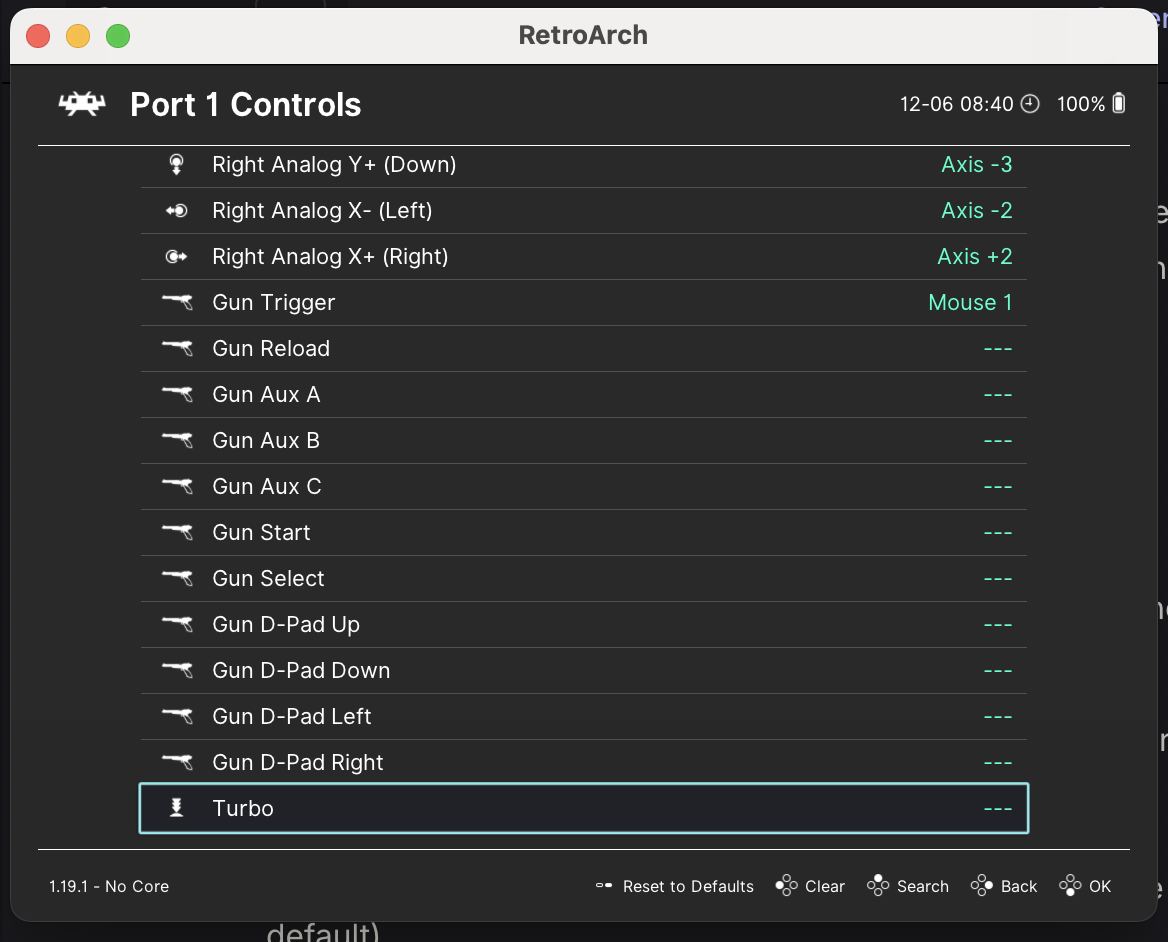
- Port 1 Controls
Turbo can be found at the bottom of the list. Select it, then hold down a button until the timeout ends in order to assign it.
While a game is running, additional options can be found here:
- Settings
- Input
- Turbo Fire
Or alternatively here:
- Main Menu
- Quick Menu (can be accessed directly while playing a game by pressing the F1 key, by default)
- Controls
- Turbo Fire
These options are available:
- Turbo Period: Sets the frequency of the turbo inputs.
- Turbo Duty Cycle: Sets how long each turbo input is held for.
- Turbo Mode:
- Classic: Allows you to hold the turbo button at the same time as any other button to cause that button to turbo.
- Single Button (Toggle): Allows the turbo button to toggle one assigned button to be turbo when that button is held.
- Single Button (Hold): Allows the turbo button itself to be held to cause turbo for the one assigned button.
- Turbo Default Button: Assigns the one button to be used with Single Button (Toggle) and Single Button (Hold) modes.
- Allow Turbo D-Pad Directions: Self-explanatory.
You can make sure changes to RetroArch's configuration are saved by selecting this option:
- Main Menu
- Configuration File
- Save Current Configuration
To save configuration automatically when RetroArch quits, enable the option under these menus:
- Settings
- Configuration
- Save Configuration on Quit
This may already be enabled by default in more recent versions of RetroArch.
Game-specific configuration
If you only want a turbo button to be available while playing certain games, you can use RetroArch's overrides feature. Overrides allow you to have different versions of the global configuration applied per game, per core, or per content directory (e.g. an NES games folder). While you have a game running, you can find these options under these menus:
- Main Menu
- Quick Menu
- Overrides
- Save Game Overrides, Save Content Directory Overrides, or Save Core Overrides
This can be helpful when managing controller conflicts between different systems. For example, if you assigned the turbo button to an R button on your controller while playing NES games, this could then conflict with the actual R button when playing a SNES game. If your NES games and SNES games were kept in separate folders, you could save a content directory override in order to load different turbo button options for NES and SNES.
Core-specific configuration
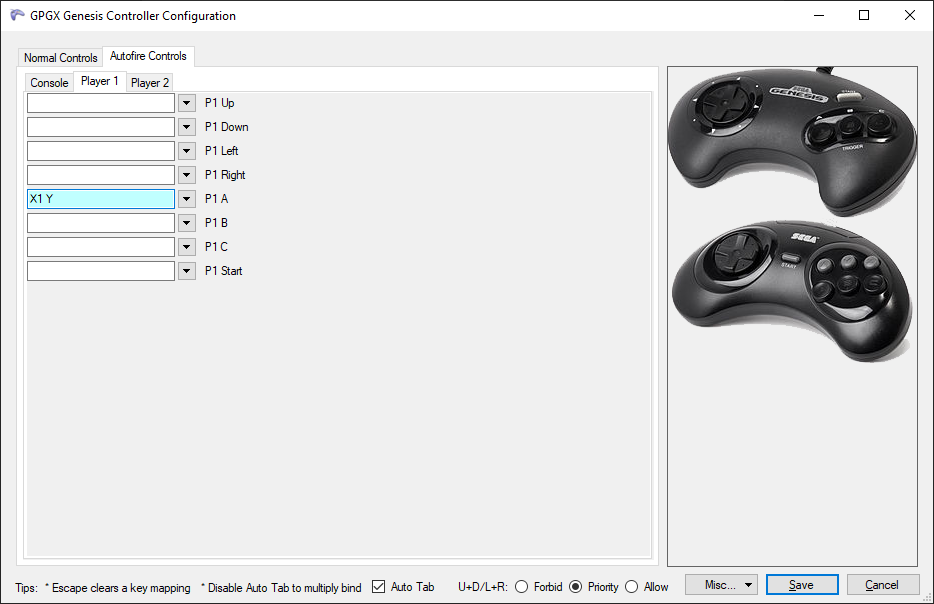
In addition to RetroArch's global turbo button, some cores have their own options to assign built-in turbo buttons. While having a game running, you can access these options under these menus:
- Main Menu
- Quick Menu
- Controls
- Port 1 Controls
Some of the applicable cores are listed below, along with the default RetroPad buttons.
Game Boy - Gambatte
- Turbo A (default: Y)
- Turbo B (default: X)
Game Boy Advance - mGBA
- Turbo A (default: Y)
- Turbo B (default: X)
- Turbo L (default: Left Trigger)
- Turbo R (default: Right Trigger)
NES - FCEUmm
- Turbo A (default: Y)
- Turbo B (default: X)
- Turbo A+B (default: Right Thumb)
Under Quick Menu -> Core Options -> Input, there is an option to enable these turbo buttons for player 1 and/or player 2. Turbo Delay can also be set.
NES - Mesen
- Turbo A (default: Y)
- Turbo B (default: X)
Under Quick Menu -> Core Options -> Input, there is an option to change the turbo input speed.
PC Engine - Beetle SuperGrafx
- III (default: X)
- IV (default: Y)
Under Quick Menu -> Core Options -> Input, the Turbo Hotkey Mode option can enable the III and IV buttons to have turbo functionality. It can be set to Toggle (press III or IV once to cause the II (default: A) or I (default: B) buttons to be turbo when held) or Dedicated (hold III or IV to directly cause a turbo II or I). There is also an Alternate Turbo Hotkey that, when Toggle is set, allows the L3 (Left Thumb) and R3 (Right Thumb) inputs to toggle the turbo functionality for II and I. The Turbo Delay option can change the frequency of the turbo inputs.
BizHawk
BizHawk uses the term autofire for this feature - turbo instead refers to increasing the emulation speed. While a game is running, you can access autofire configuration under this menu:
- Config
- Controllers
- Autofire Controls tab
Autofire can be assigned to any button in the current core.
Alternatively, a toggle style autofire button can be assigned under this menu:
- Config
- Hotkeys
- General tab
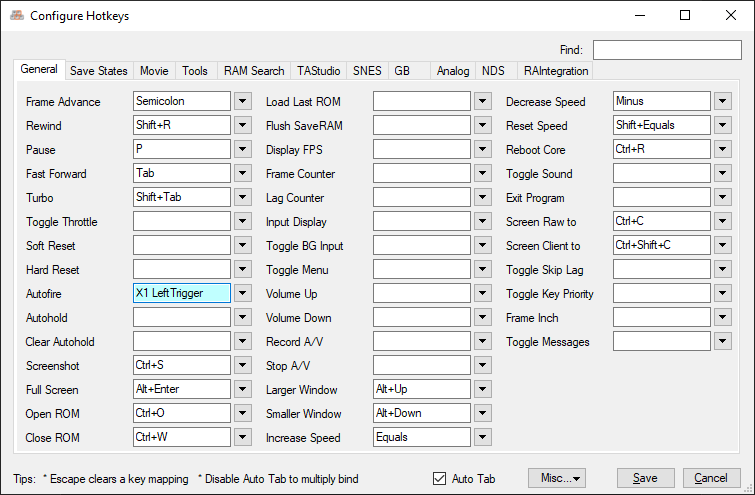
To use it, hold the autofire button while you press any other button to cause that button to rapidly input. Hold the autofire button again and press a button to disable it.
Additional options to change the frequency and duration of button presses can be found under Config -> Autofire. Different configurations can be saved or loaded by selecting the options at the bottom of the Config menu.
DuckStation & PCSX2
The macro feature in DuckStation and PCSX2 can be used for this function. It works the same way in both emulators, and can be accessed here:
- Settings
- Controllers
- Controller Port 1
- Macros tab
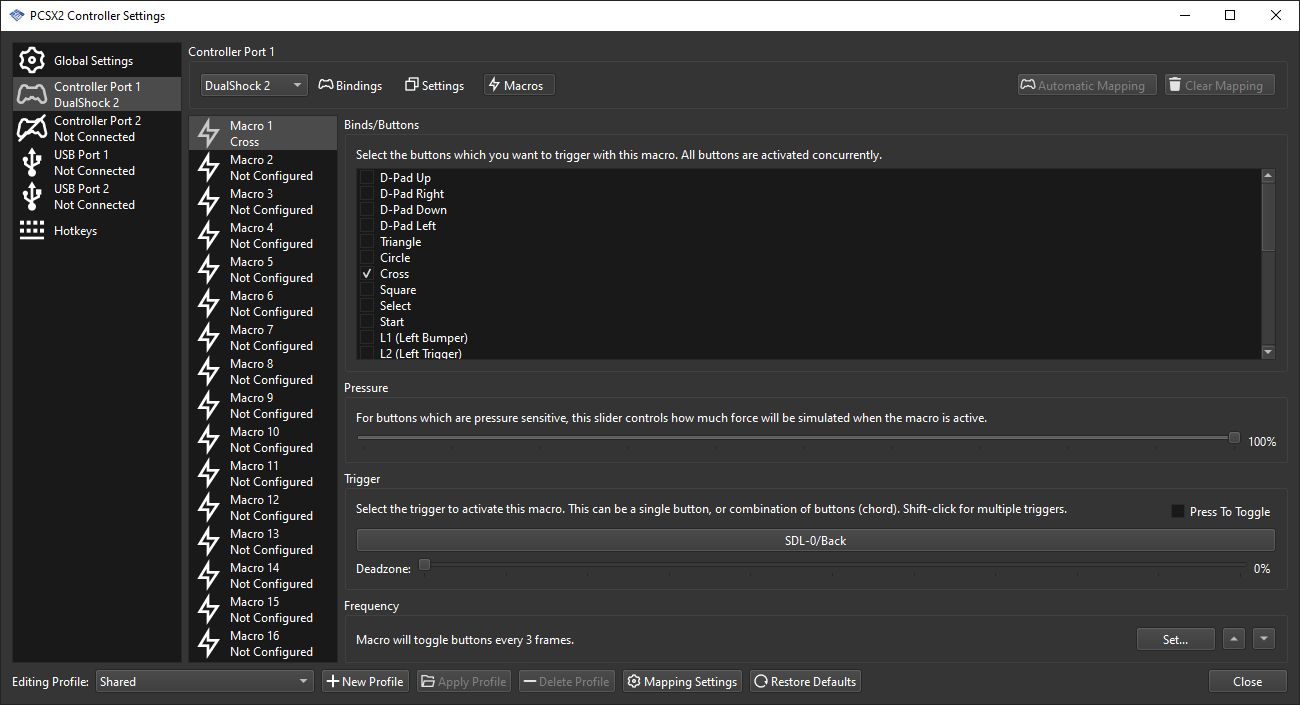
Select the buttons you wish to rapidly input, then assign the trigger to a button. A checkbox allows you to use it as a toggle if you wish. Set the frequency at the bottom of the page to allow the macro to be used as a turbo button. PCSX2 has a couple additional options related to button pressure and deadzone.
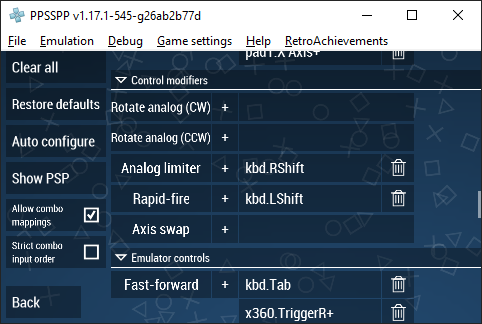
PPSSPP
PPSSPP uses the term rapid fire for this feature. By default, it is assigned to Left Shift, but it can be changed under this menu:
- Settings
- Controls
- Control Mapping
- Scroll down to the Control Modifiers section
Hold this button while you hold any other button to cause that button to rapidly input. Under Settings -> Controls, you can scroll down to the Keyboard Control Settings section to find an option to change the rapid fire interval.