Contributing to the Docs
All contributions to the docs are welcome.
We appreciate your interest in contributing. Whether you're new to Git or a seasoned developer, we've got you covered. Here's how you can help improve our docs:
Quick Edits
If you just want to make a quick edit to an existing page, follow these simple steps:
- Edit This Page: Visit any page on the docs site, scroll to the bottom, and click the "Edit this page" link.
- Fork the Repository: Click the "Fork this repository" button. This will create your own copy of the docs.
- Make Your Changes: Use the Markdown editor on the screen to make and preview your changes.
- Submit Changes: Click the "Commit changes" button. Write a title and description for your changes, then submit.
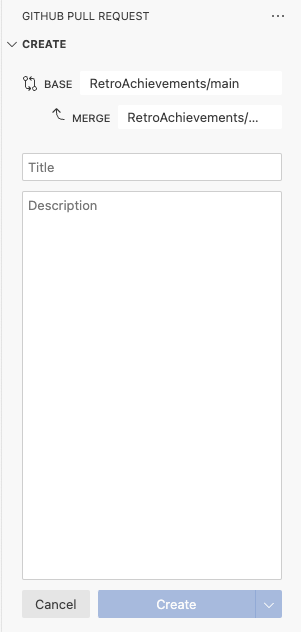
- Create Pull Request: Click the "Create pull request" button. Write a title and description for your pull request and submit it for review.
Detailed Contributions
If you want to create new pages or work on multiple pages, follow these steps:
1. Fork the Repository
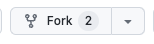
- Go to the repository's page and click the "Fork" button.
- Press "Create fork" on the form that appears.
2. Open in VSCode
- Once you're viewing your fork (usually at
github.com/your-username-here/docs), press the period (".") key on your keyboard to open VSCode in your browser. - Use the file tree on the left to explore the docs, specifically by expanding the "docs" folder.
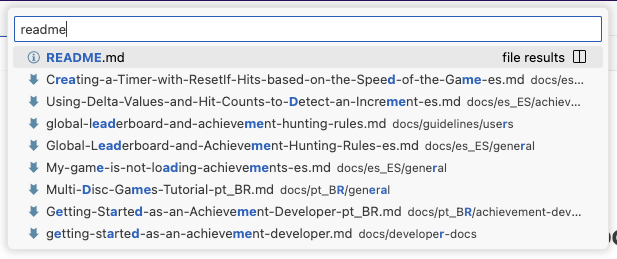
- Use the Ctrl+P hotkey to search for files, such as "README".
3. Edit and Preview
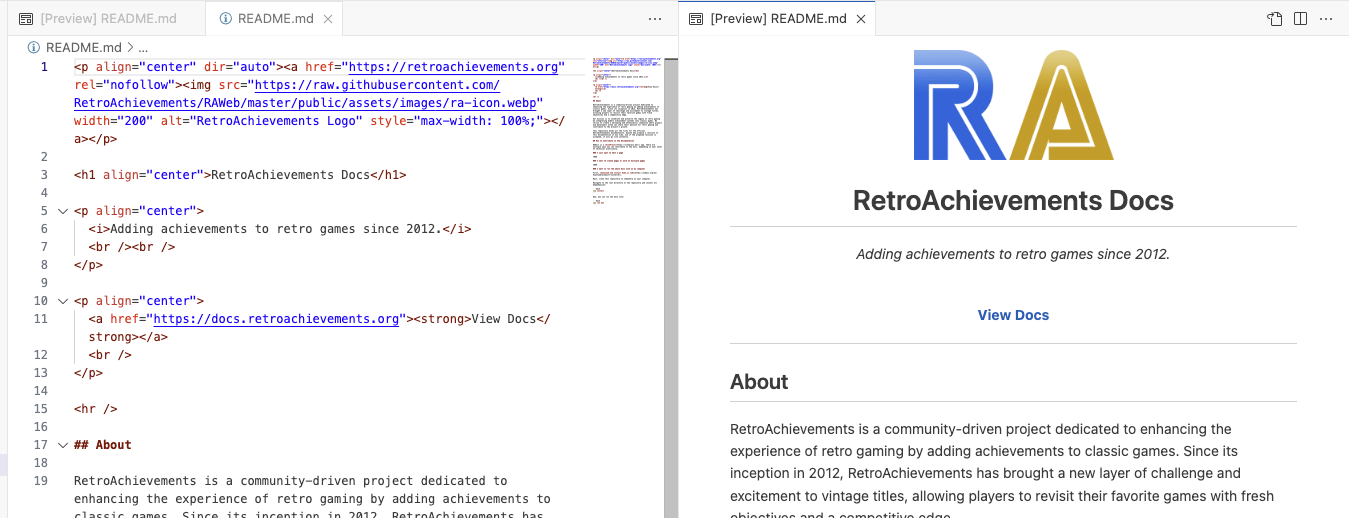
- Open the command palette with Ctrl+Shift+P (or F1 in Firefox), search for "markdown preview", and select "Markdown: Open Preview to the Side".
- Use the Markdown preview to see your changes as you write them.
4. Create a Branch
- Click the branch name (usually
main) at the bottom left of VSCode. - Click "Create branch", name your branch, press Enter, and then click "Switch to Branch".


5. Save and Commit
- Use Ctrl+S to save files as you work.
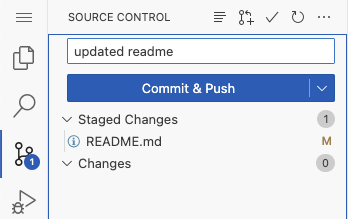
- Click the Source Control icon on the left, right-click the files you've changed, and click "Stage Changes".
- Write a commit message, then click the "Commit & Push" button.
6. Create Pull Request
- Open the command palette with Ctrl+Shift+P (or F1 in Firefox) and use the "Create Pull Request" command.
- Fill out the form with a title and description, then click "Create".

Adding New Pages
If you want to add a new page, you'll need to update the sidebar config in en.ts file. This is how you can hook up navigation to new pages.
For example, if your new Markdown file is docs/general/my-file.md, add this to sidebarGeneral():
{
    text: "My New Page",
    link: "/general/my-file",
}
It is also a best practice to add this to the configs of the other languages to keep them in sync, even if it's commented out:
// {
//     text: "My New Page",
//     link: "/general/my-file",
// }
Running the Docs Site Locally
To run the docs site on your computer:
Install Git. Download and install Git if you're a Windows user.
Open a command prompt/terminal and clone the repository:
git clone https://github.com/RetroAchievements/docs.git- Navigate into the cloned repository and run the local dev server:
cd docs
npm install
npm run dev
That's it! Your local server should now be running, allowing you to preview your changes.
Markdown caveats
Markdown is a lightweight and extremely easy to learn markup language with plain text formatting syntax. In order to contribute in our project you must know at least the basics of markdown. Here is a good one-page reference: http://commonmark.org/help/, and here you can try a 10 minutes tutorial.
Headings
The headings (defined by #) should follow a natural progression of the hierarchy of the page contents.
✅ GOOD

# Title
## Main heading one
### Sub Heading one
### Sub heading two
## Main heading two
Every page must start with a title heading (#).
🛑 BAD

## Main heading one
### Sub Heading one
### Sub heading two
## Main heading two
You cannot have two title headings (#).
🛑 VERY BAD

# Title
# Title Two
## Main heading one
### Sub Heading one
### Sub heading two
## Main heading two
Links
Internal docs links should follow this syntax, with .md and .html extensions omitted:
✅ GOOD

[Tips and Tricks](/developer-docs/tips-and-tricks)

[Rules](/guidelines/users/code-of-conduct#rules)
Do NOT use absolute paths when referencing another page on the docs. VitePress will automatically detect and warn when links are broken, but this detection doesn't kick in for absolute paths.
🛑 BAD

[Tips and Tricks](https://docs.retroachievements.org/developer-docs/tips-and-tricks.html)

[Rules](https://docs.retroachievements.org/guidelines/users/code-of-conduct.html#rules)
Images
You can add images to the project by placing them in the docs/public directory.
Links to images should follow this syntax:
✅ GOOD
Try not to reference images on any external site, including RetroAchievements itself. It is dangerous to reference images that are not within docs/public as they might break at any time.
🛑 BAD
Always be sure your alt text within square brackets is accessible. If the image ever breaks for any reason, this text is what users will see. It should be a concise description of the image. Google punishes pages that do not have this text and sometimes delists them altogether so people can't find them. This is very important.
🛑 VERY BAD
Tables
A simple table looks like this:
| First Header | Second Header | Third Header |
| ------------ | ------------- | ------------ |
| Content Cell | Content Cell  | Content Cell |
| Content Cell | Content Cell  | Content Cell |
| Content Cell | Content Cell  | Content Cell |
It will render like this:
| First Header | Second Header | Third Header |
|---|---|---|
| Content Cell | Content Cell | Content Cell |
| Content Cell | Content Cell | Content Cell |
| Content Cell | Content Cell | Content Cell |
You can specify alignment for each column by adding colons to separator lines:
| First Header | Second Header | Third Header |
| :----------- | :-----------: | -----------: |
| Left         | Center        | Right        |
| Left         | Center        | Right        |
| Left         | Center        | Right        |
Results:
| First Header | Second Header | Third Header |
|---|---|---|
| Left | Center | Right |
| Left | Center | Right |
| Left | Center | Right |
VitePress Components
VitePress supports a lot of additional functionality beyond traditional GitHub Markdown. It can all be referenced here.
Automatic Table of Contents
Input
[[toc]]Output
Alert Containers
Input
::: info
This is an info box.
:::

::: tip
This is a tip.
:::

::: warning
This is a warning.
:::

::: danger
This is a dangerous warning.
:::

::: details
This is a details block.
:::
Output
INFO
This is an info box.
TIP
This is a tip.
WARNING
This is a warning.
DANGER
This is a dangerous warning.
Details
This is a details block.